
Discover the Simplicity of Automating Leave Requests with Power Automate
Imagine this: It’s a busy week, and you urgently need to take a day off. You draft your leave request email, send it to your manager, and wait. Hours pass, and you haven’t received a response. Your manager is swamped with emails, and your request is buried in their overflowing inbox. Frustration sets in as you realize the manual process is causing unnecessary delays.Welcome to our latest blog post: “How To Create A Leave Request Approval Flow In Power Automate: A Step-By-Step Guide For Beginners.”
Now, picture a different scenario. You submit your leave request through a simple online form. Instantly, your manager receives a notification, reviews your request, and approves it with a single click. You receive an immediate confirmation, and your leave is seamlessly recorded. No more waiting, no more wondering. This is the power of automation.

In this guide, we will show you how to transform the cumbersome process of leave requests into a smooth, automated workflow using Power Automate. Whether you’re an HR manager, a team leader, or an employee looking for a more efficient way to handle leave requests, this tutorial is for you.
You’ll learn:
- How to set up a leave request form
- How to create an approval flow in Power Automate
- How to configure notifications and approvals
- Tips and tricks for customizing the flow to fit your specific needs
Join us as we break down each step, making it easy for even the most non-technical users to follow along. Say goodbye to the endless back-and-forth emails and hello to a streamlined, efficient leave request process.
Ready to simplify your workflow and boost productivity? Read on and discover how Power Automate can revolutionize your leave approval process. Let’s get started!
Step 1: Create Microsoft Form
1.Log In: Go to the Microsoft Form website and log in with your Microsoft account.
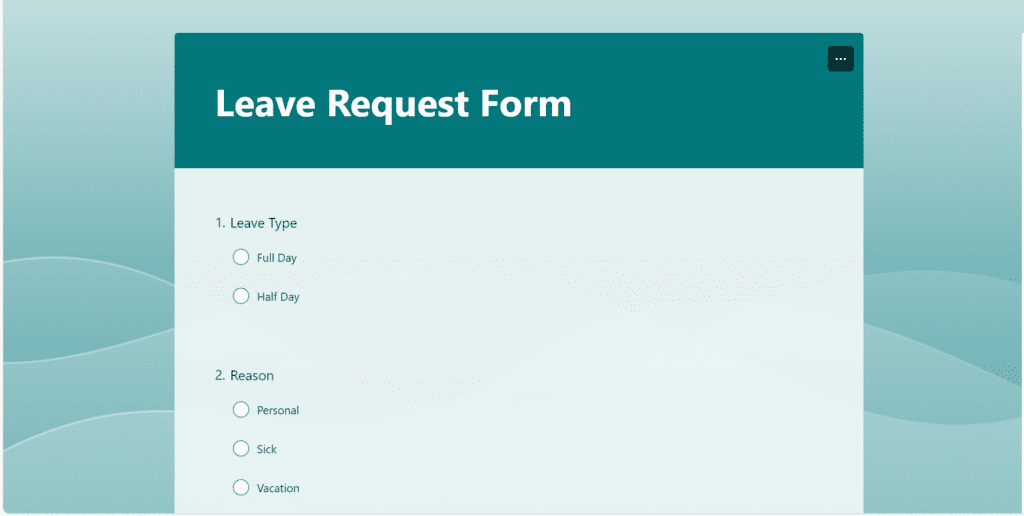
2.Create a Leave Request Form: You have to create Microsoft Form for Leave request, Which you can use to pull Leave request data for your approval Flow.
3.Form: Create Form like this and add (Leave Type, Reason, Leave Date-From, Leave Date-To) into that from, You can add fields as per your needs.
Step 2: Access Power Automate
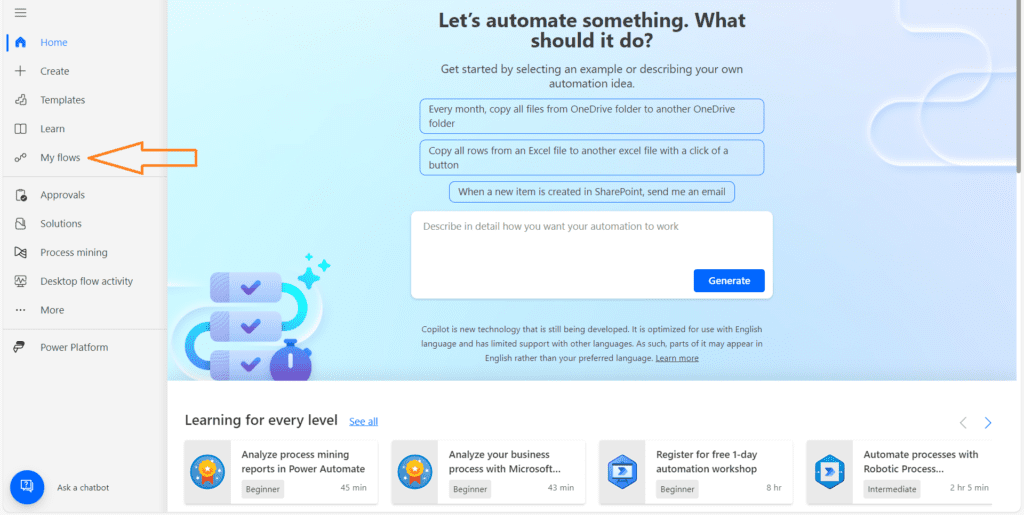
1. Log In: Go to the Power Automate website and log in with your Microsoft account.
2. Navigate to My Flows: Click on “My Flows” in the left-hand menu.
Step 3: Create a New Flow
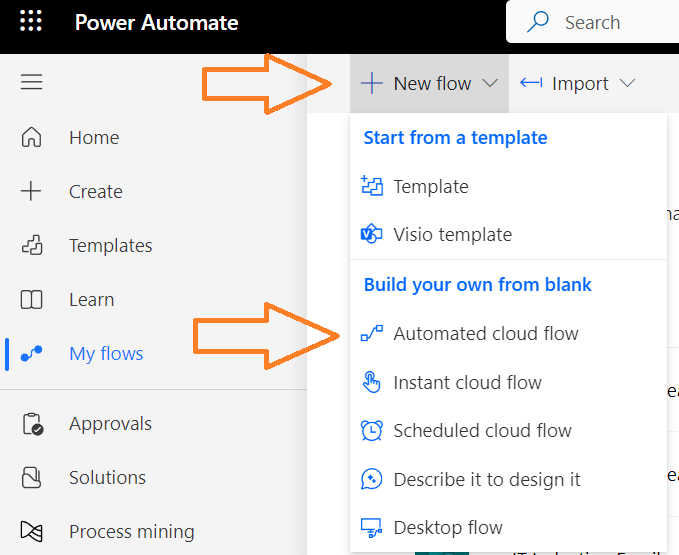
1.Select New Flow: Click on “New Flow” and choose “Automated cloud flow” from the dropdown menu.
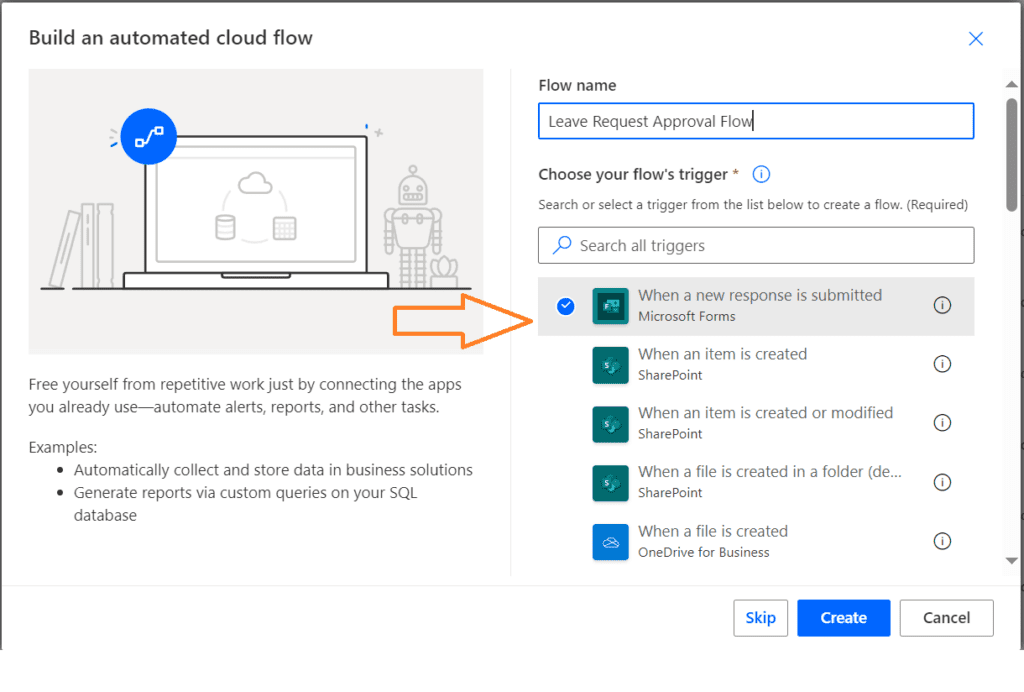
2.Name Your Flow: Enter a name for your flow, such as “Leave Request Approval Flow”.

Choose a Trigger: Search for and select the trigger “When a new response is submitted” (Microsoft Form). Once you select the trigger click on “Create”
Step 3: Setting Up the Initial Trigger
Add Microsoft Form: Select Microsoft Form which you have created for “Leave Request Form as a trigger”

Get Response Details: Add action in your Flow, to pull information of user submitted “Leave Request Form”
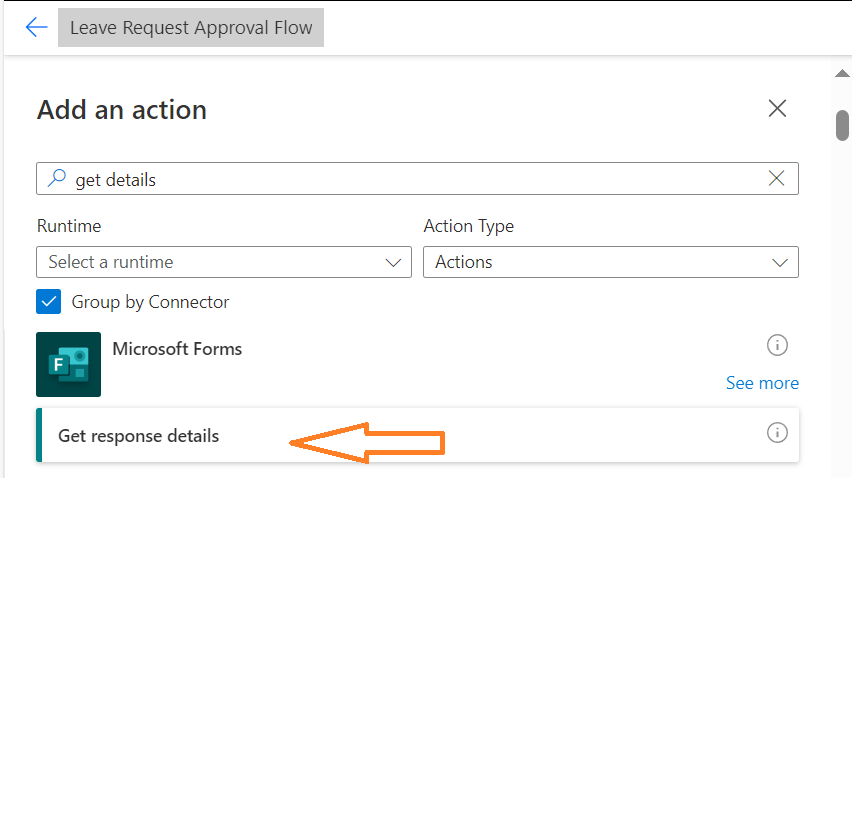
Configure Action: You have to configure action to get data of requester, Like Requester Name, Leave Reason, Date etc.
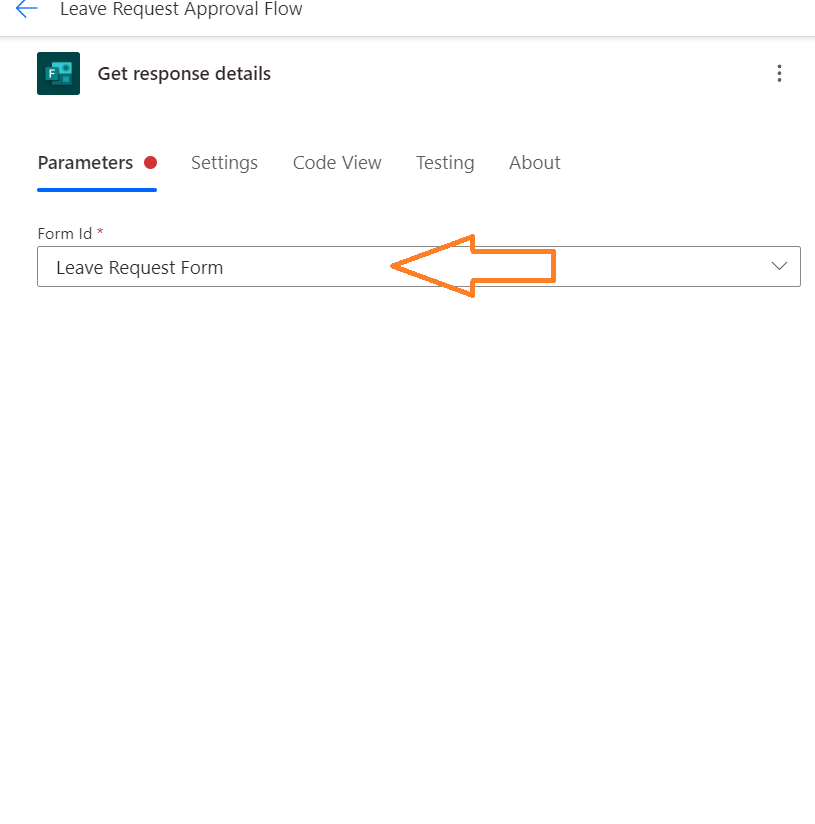
Steps for Configure Action:
1. Select form id as your Leave Request Form
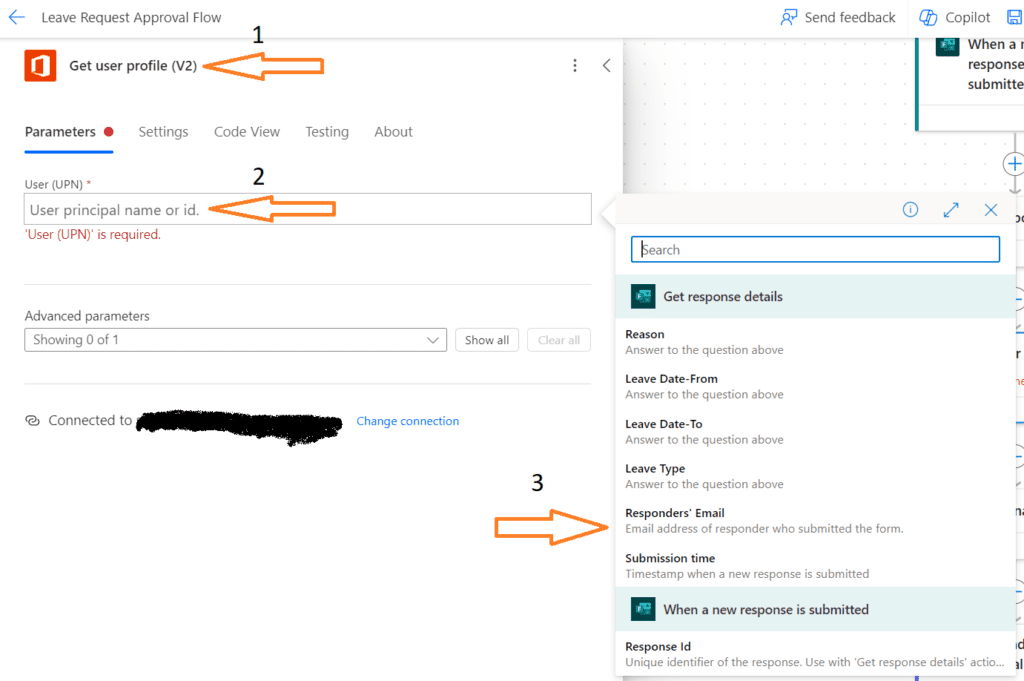
2. Click on the Dynamic content to Select Response ID to complete the Action of your Flow

3.Response ID: Choose “Response ID” from popup window.

4.Add Get user profile action to retrieve requester data (e.g “Display Name”, “Email Address” etc.)
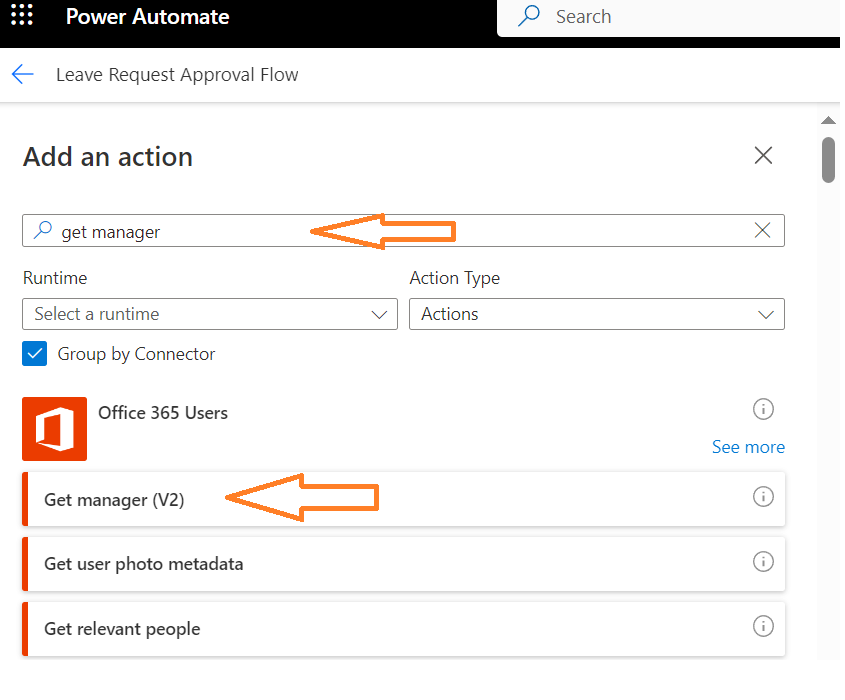
4. Add one more action to get requester manager email ID from M365 email.
Step 4: Adding and Configuring the Approval Action
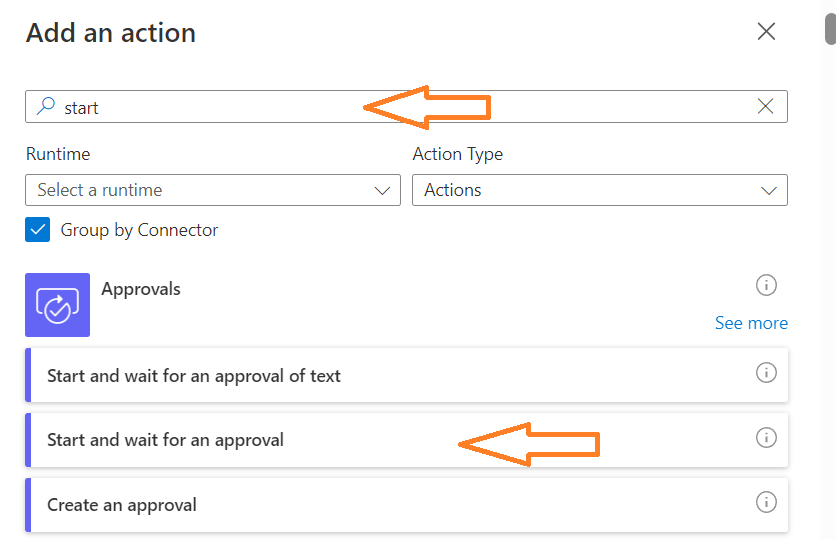
Add a New Action: Click on “Add Action” and search for “Start and wait for an approval”
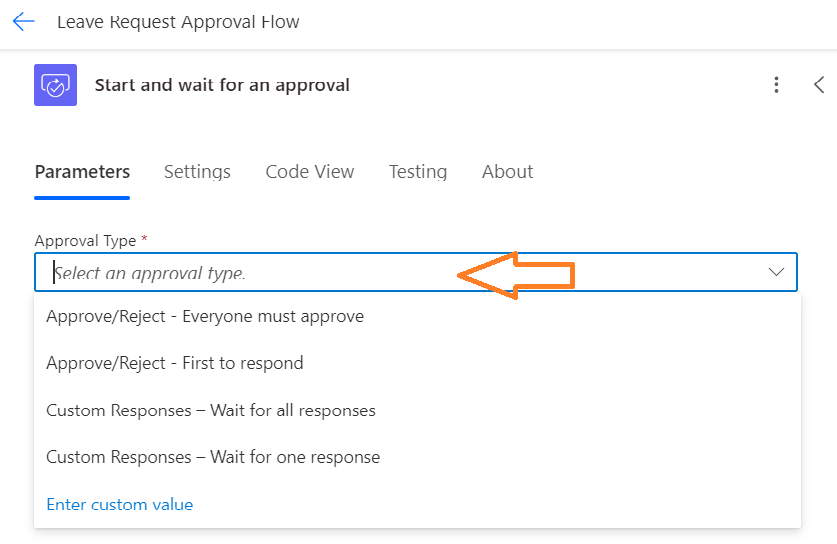
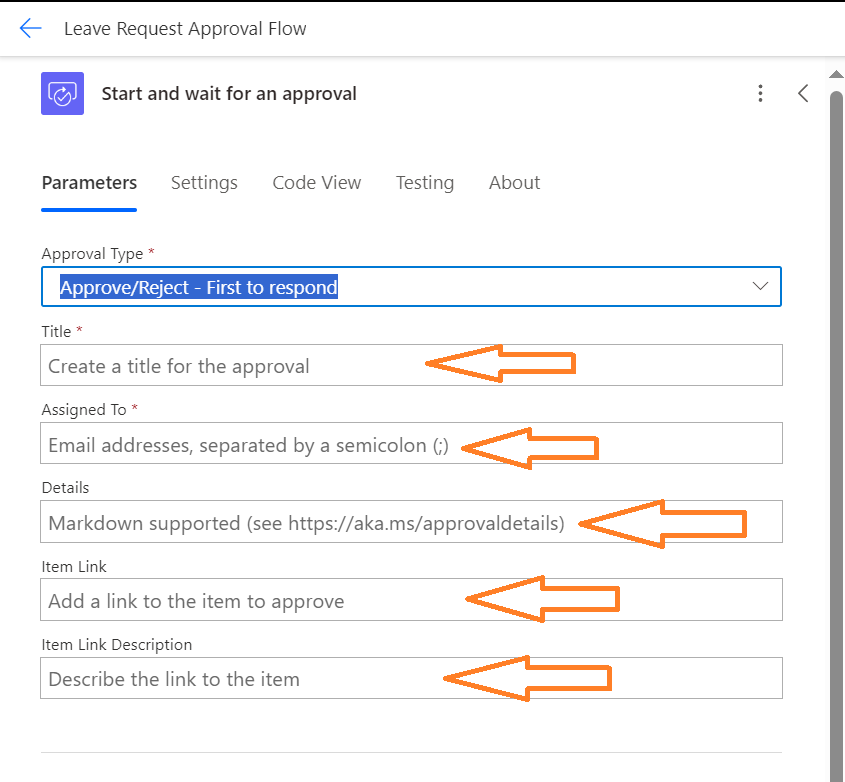
Approval Type: Choose Approval type as per your requirements. (e.g., “Approve/Reject – First to respond”).
Customize Approval Details: Include dynamic content in the approval request details, such as “Title”, “Assigned To”, and “Details” etc. Add Manager mail from Dynamic content.
Step 5: Define “true or False” Condition
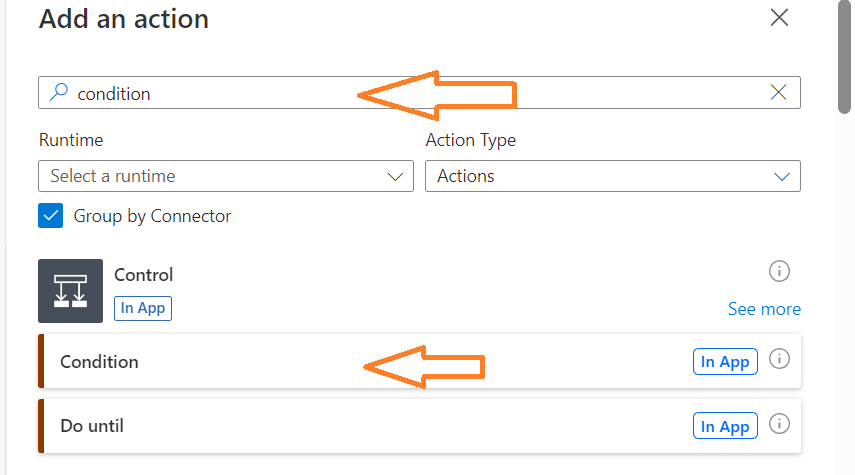
1. Click on “Plus icon” in the flow, Which you can see below the “Start and Wait approval condition” in your Flow
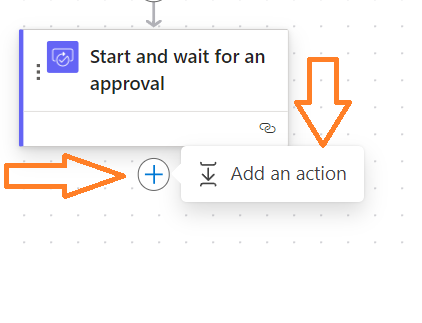
2. Then Search for Condition, Which can help you to define “True or False” condition.
Approval Request in Teams and Outlook
When someone submit the “Leave Request Form” manager will receive an approval request,They can conveniently approve it directly from Microsoft Teams or Outlook. In Teams, the request will appear in your chat or activity feed, allowing you to view the details and make your decision without leaving the app. In Outlook, the approval request will arrive as an email, where you can review the information and approve or reject it with a single click. This seamless integration ensures you can manage approvals efficiently, no matter which platform you prefer to use.

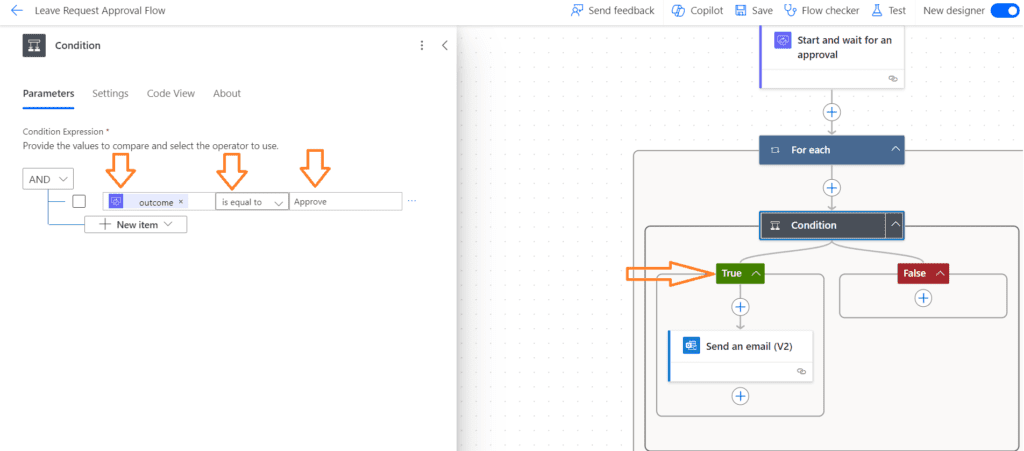
Set Up Condition: Define the condition to check the outcome of the approval (e.g., “Outcome is equal to Approve”).
Send Approval Email
- If True Branch: Configure actions for approved requests, Like Send an email to requester to know the status of the request in the True section. Customize send an email template as per your need.
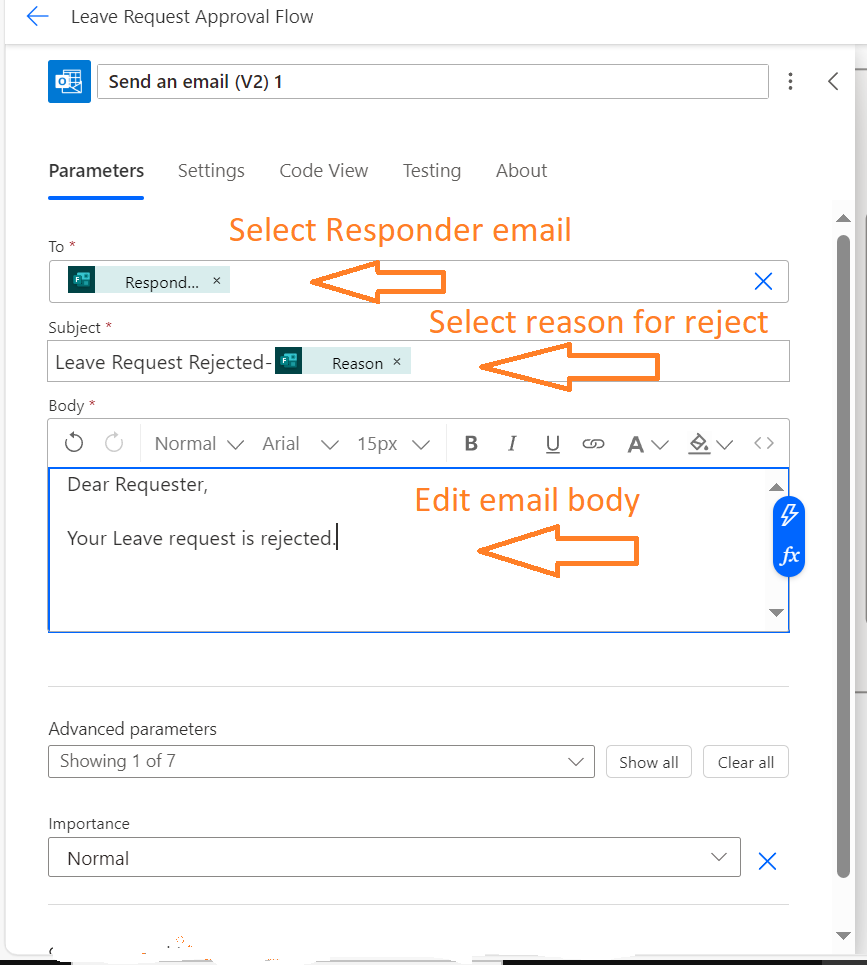
- If False Branch : Configure actions for rejected requests, Like Send an email to requester to know the status of the request in the False section.
Congratulations on Mastering the Art of Leave Request Approval in Power Automate: Your Journey to Automation Excellence Begins Here!
By following these steps, you’ve successfully created a leave request approval flow in Power Automate. This automation will help streamline your leave request process, making it more efficient and reliable. Don’t forget to customize the flow to meet your organization’s specific needs and follow best practices for creating efficient workflows.

